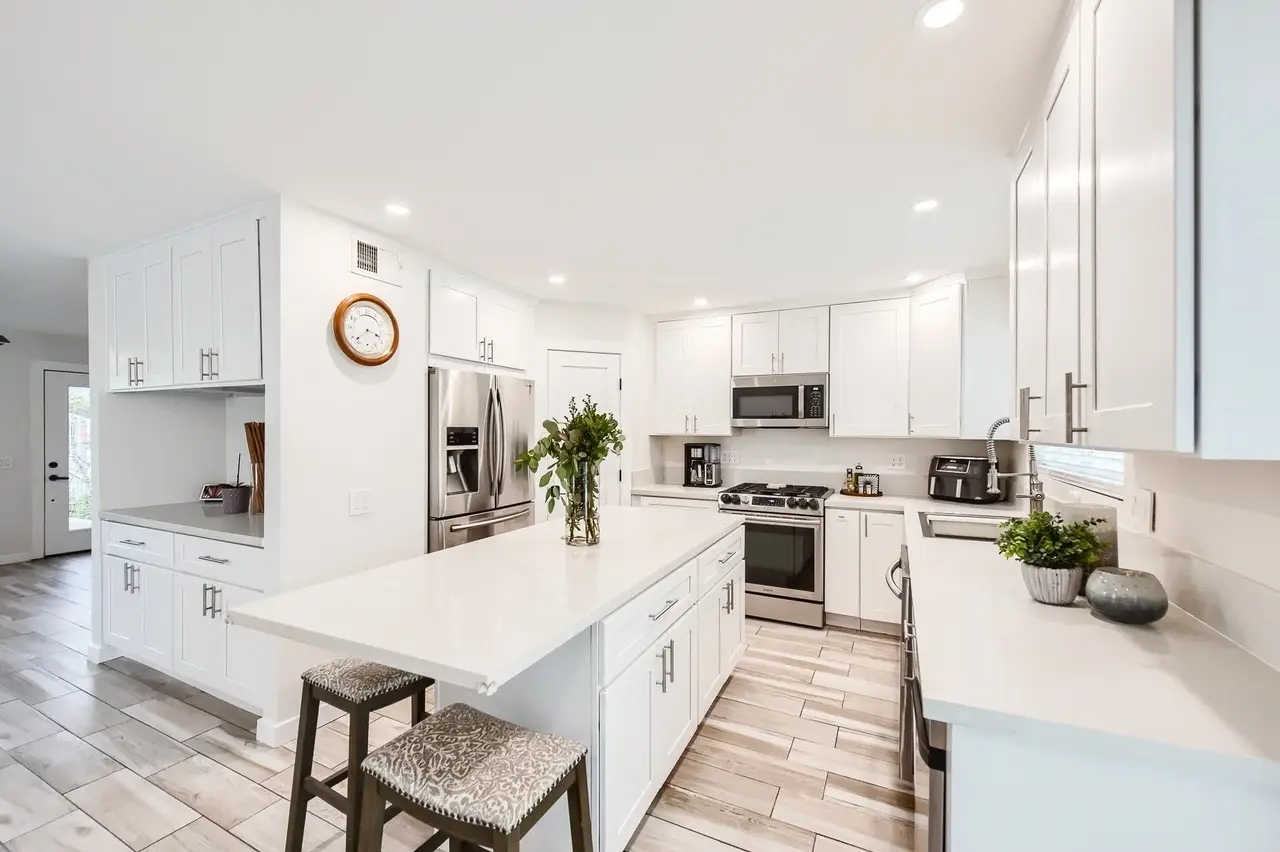
Wide view of a white kitchen with a long island, white cabinet doors, and light plank flooring
White cabinets · refinished
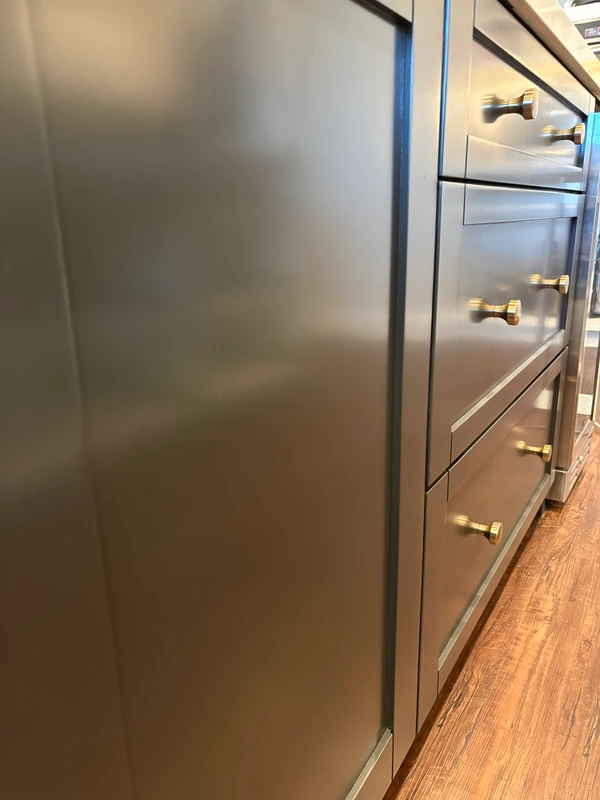
Room reflections and a stainless pull on finished black island doors in Temecula
Black island · sprayed 2K

Sprayed 2K

Cabinet Refinishing Cost in La Quinta

A smooth sprayed finish. A kitchen you're proud to show off.

  • Yelp: 56 reviews, 4.8-star rating
  • Google: 10 reviews, 5.0-star rating
  • 5-Year Written Warranty

    The written 5-year warranty covers chipping, peeling or blistering caused by faulty preparation. The coating itself is covered by its manufacturer.

  • CSLB #1015608

See and feel finish samples in your own kitchen.

Standard single-color exterior cabinet refinishing commonly runs about $135–$185 per cabinet door and $95–$145 per drawer front before project-specific adjustments.

Coachella Valley · Cabinet cost guide

Budgeting for La Quinta cabinets

Southern California planning guidance — not a price list.

A Cove kitchen and a PGA West kitchen need their own counts. Built-ins, altered layouts and finish condition shape the scope more reliably than a community label.

Count the pieces. Define the work.

What the La Quinta planning ranges cover

Each rate is per one physical cabinet door or drawer front — not per cabinet box.

Cabinet refinishing planning ranges: doors and drawer fronts, grain filling, and painted interiors
OptionWhat it coversPlanning range
Cabinet doorFront and back painted; cabinet boxes, face frames, toe kicks, and side panels included$135–$185 per cabinet door
Drawer frontPainted; same inclusions as the door$95–$145 per drawer front
Grain filling (optional)Light for shallow grain or heavy for deep grain such as red oak; door fronts only, or fronts and backsadds $30–$85 per cabinet door; $10–$20 per drawer front
Painted interiors (optional)The inside of the cabinet boxes, cleaned and sprayed; an average, since it depends on how many boxes there are and their conditionadds $35–$60 per cabinet door; $25–$45 per drawer front

These planning ranges include the standard exterior work on your cabinets: door fronts and backs, drawer fronts, face frames, box exteriors, toe kicks, and side panels.

They also include removal and reinstall, preparation, 2K polyurethane, HEPA-vacuumed sanding, sealed negative-pressure containment, and the 5-year written warranty.

Tyler Fowler handles each project personally.

Oak grain remains visible unless you choose grain filling.

A fan draws air through a regular filter and vents outdoors to help control airborne dust, overspray, and fumes within the work area.

Tyler provides a fixed written quote after counting your doors and drawer fronts and looking over the cabinets in person.

For a full kitchen, the door and drawer-front count is the starting point.

Pricing guidance last verified October 24, 2026.

The Cove and PGA West have different development histories

La Quinta’s historic resource survey traces the Cove’s residential development to the 1930s. It also records the sale of the Kennedy Ranch land for PGA West in the 1970s. These are distinct local histories, not a claim that the cabinets at either address are original or built from one standard material.

At a Cove property, identify earlier cabinet boxes, later replacement doors and any added pantry or island. A remodel can introduce a different finish on adjoining pieces. The estimate should follow those transitions instead of assigning the whole kitchen the construction date of the original house.

For PGA West, list any cabinetry beyond the main kitchen that is requested in the same project. A bar, breakfast cabinet or separate built-in adds its own doors, fronts and exposed surfaces. It should be counted rather than folded into a guess based on the size or value of the home.

Desert exposure and finish detail need individual decisions

La Quinta shares the Coachella Valley’s hot, dry desert climate. Look separately at cabinet faces near bright glazing and storage sheltered from direct light. If one run is discolored or the old finish is failing, show that difference during the visit rather than assuming every surface has the same preparation need.

A dark stained appearance does not identify the wood underneath. If open grain is present, retaining texture and filling it are different finish choices. Routed profiles, decorative end panels and earlier patches should be shown to Tyler so the written scope describes the surfaces being changed.

At a PGA West association property, ask which contractor-entry, parking and work instructions apply to the address. For a Cove residence, explain the available carrying route and any constrained access. Neither setting creates a published local price tier; the project plan must account for the actual property.

Define the room refresh without expanding the cabinet allowance

Choose whether the cabinet project stops at the kitchen or includes a nearby built-in. Then separate exterior color work from optional interiors and grain filling. That boundary makes the written quote useful when comparing an entire kitchen refresh with a narrower request to change only selected cabinetry.

If designer wallpaper is part of the room plan, identify the wall and material as a separate scope. Wallpaper installation is available in La Quinta, and the cabinet finish can be discussed alongside it. Combining the design conversation does not make wallpaper or unrelated wall work part of the cabinet planning rate.

Planning the visit from Anza

La Quinta is about 40 road miles from Anza in published routing. The east-corridor approach follows CA-371 and CA-74 into Palm Desert before continuing toward La Quinta. A Cove street and a PGA West entrance require different local directions, so give the full address and entry instructions when arranging the estimate.

Local context sources

Housing history and place names are context for an inspection; they do not establish the material in an individual kitchen.

Questions before the quote

La Quinta cabinet cost FAQ

Do Cove cabinets automatically date from the 1930s?

No. La Quinta’s survey dates the Cove’s early development, not the cabinetry now in an individual house. Show Tyler any later remodel or added storage. The finish condition and actual materials determine preparation rather than the date of the neighborhood.

Should a PGA West bar be counted with the kitchen?

Include it in the requested scope if it should receive the same finish. Its doors, drawer fronts and exposed panels need to be identified separately. A PGA West address does not establish how much cabinetry is present or include every built-in automatically.

Does a dark stained La Quinta kitchen always need grain filling?

No. The stain color does not establish the wood species or the depth of its grain. At the visit, Tyler checks the material and the finish expectation. Grain filling is an optional scope decision where open grain is present, rather than a default for all desert kitchens.

What access details help with a PGA West cabinet quote?

Provide the entry procedure and the work instructions that apply to the property, along with the requested rooms. Those details help plan removal and return of the cabinet pieces. They do not imply a universal PGA West rule or a separate community pricing schedule.

Can wallpaper be planned with a La Quinta cabinet color change?

Yes. Identify the wallpaper wall and selected material alongside the cabinetry to be refinished. The two services need distinct scopes, especially if the cabinet work includes a separate bar or built-in. Their planning can be coordinated without treating wallpaper as part of the cabinet unit rates.

Plan the La Quinta cabinet project

Get Your Free Estimate

Or call (951) 551-0583

Tyler or Melissa will reply to set up a visit. Tyler brings a sample to your home and gives a fixed written quote after looking over the cabinets in person.
The Finished Result

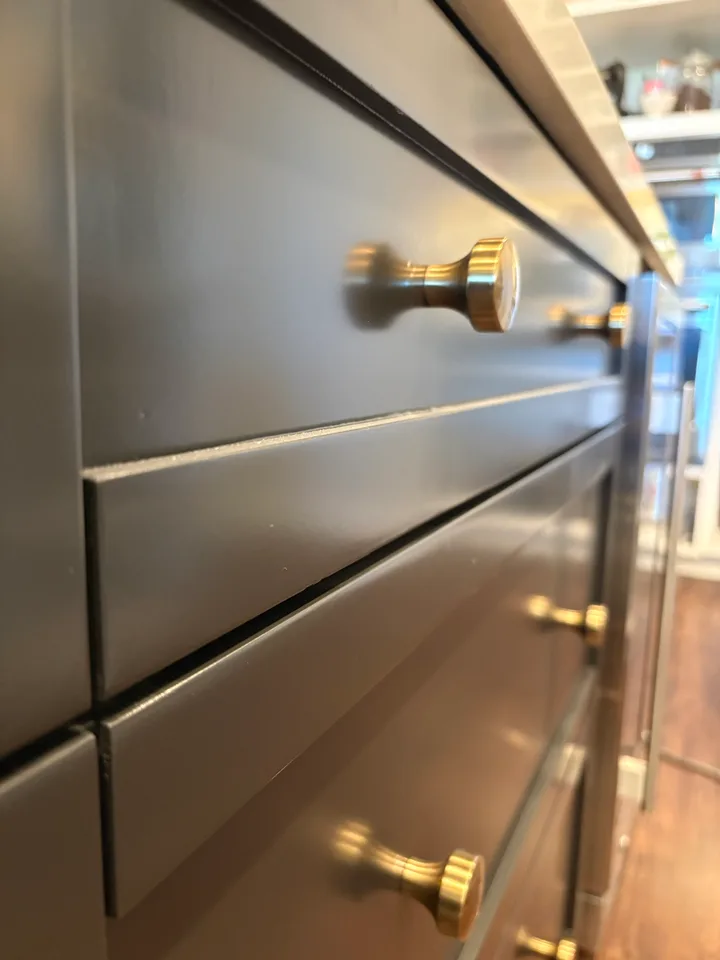
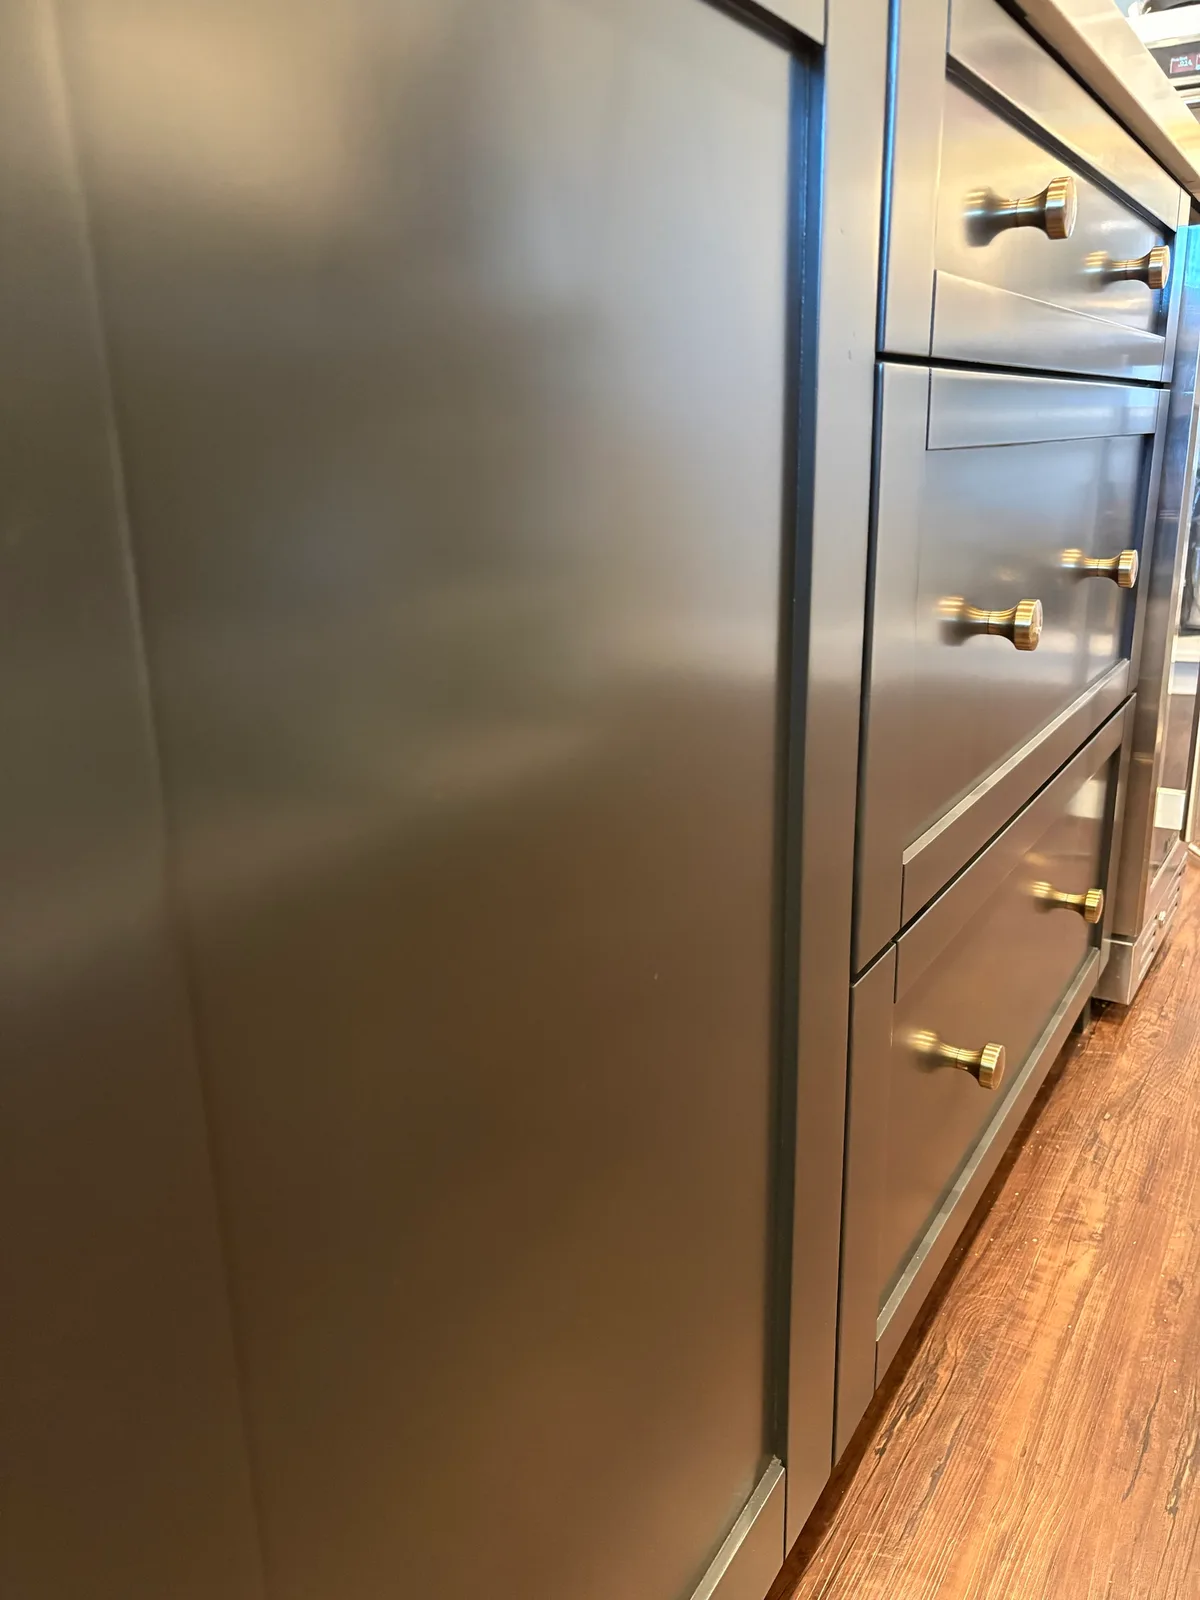
A smooth, sprayed 2K finish on a kitchen island, refinished in place.

Watch the reflection · 0:04
Black island door and drawer bank with brass knobs; the room reflects in the sprayed door
Black island · sprayed 2K

What goes into that finish

The work behind the finish.

The time is in the preparation, surface corrections, sanding and sprayed coating system. These are photos from Tyler’s process.

The Cabinet Refinishing Process

Four production phases, from door removal through the final walkthrough. Tyler Fowler handles each project personally.

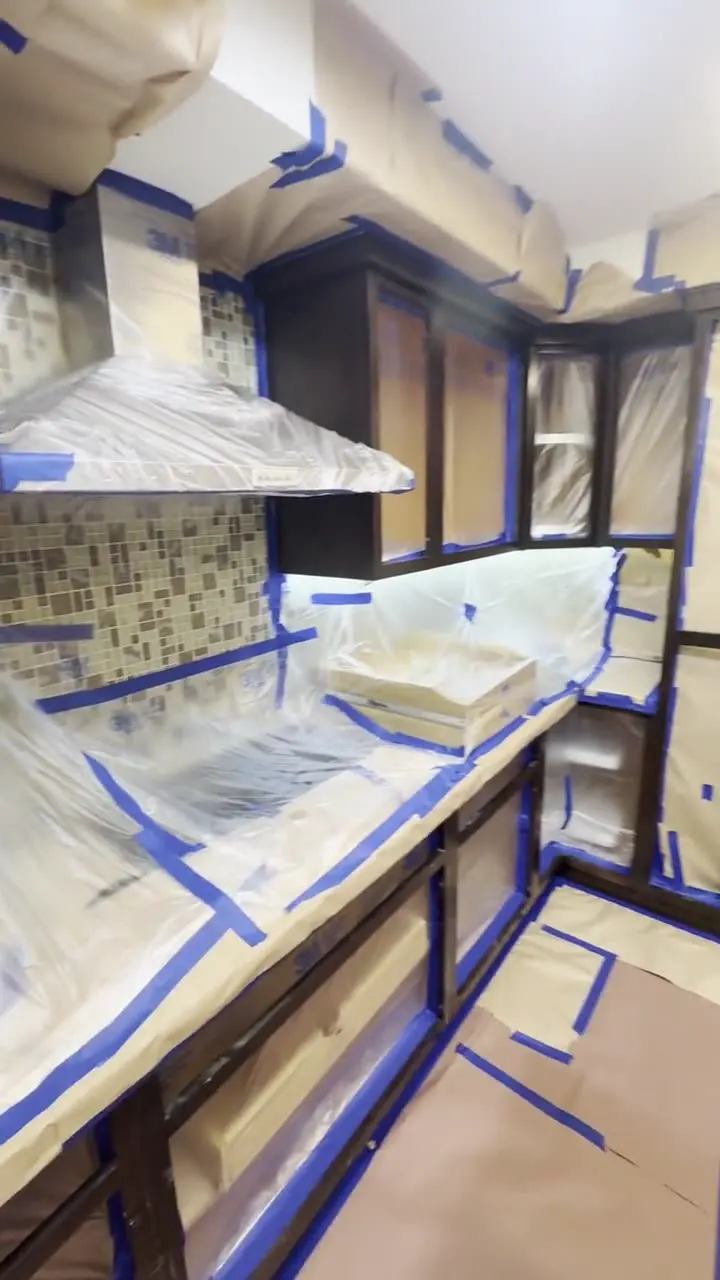
  1. Kitchen openings, counters and floors masked before cabinet preparation

    Protect & clean

    Remove and label the doors. Mask the kitchen, degrease and prepare the surfaces.

    Cabinet box exteriors are sprayed in place, inside a sealed, negative-pressure work area that is set up in the kitchen before sanding begins and stays in place through spraying.

    A fan draws air through a regular filter and vents outdoors to help control airborne dust, overspray, and fumes within the work area.

    Protect and prepare

    The doors and drawer fronts are prepped at Tyler's shop. The cabinet boxes get the same prep in your kitchen, where you can see it done.

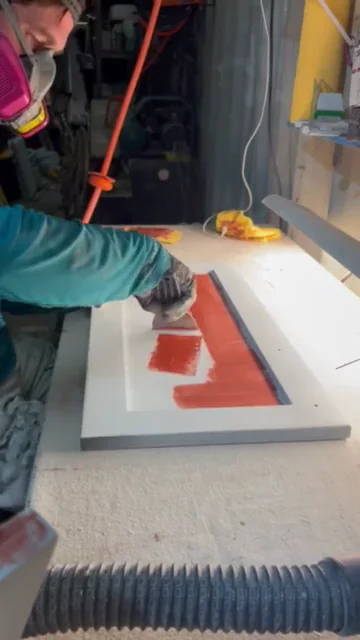
  2. Applying glazing putty to a primed cabinet door on a lit inspection table

    Prime & correct

    The longest step. Two primer coats. Between them, every surface is skim-coated with glazing putty, dents and seams are spot-puttied, and it is all sanded smooth. Every surface is checked under bright inspection lights before the topcoat. Optional grain filling.

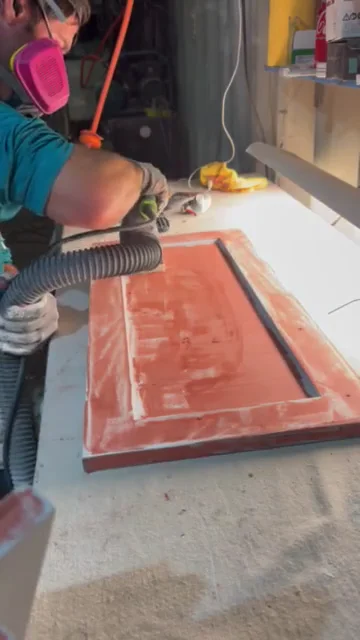
  3. Sanding the glazing-putty skim on a cabinet door

    Sand smooth

    Sand the corrections, primer and between topcoats. Each coat needs drying time.

    Sanding is HEPA-vacuumed, and the cabinet exteriors are finished in 2K polyurethane.

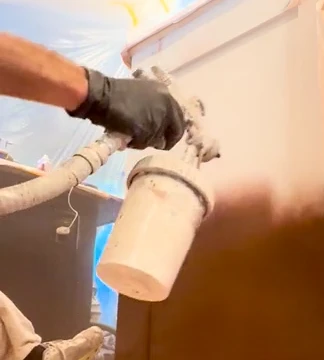
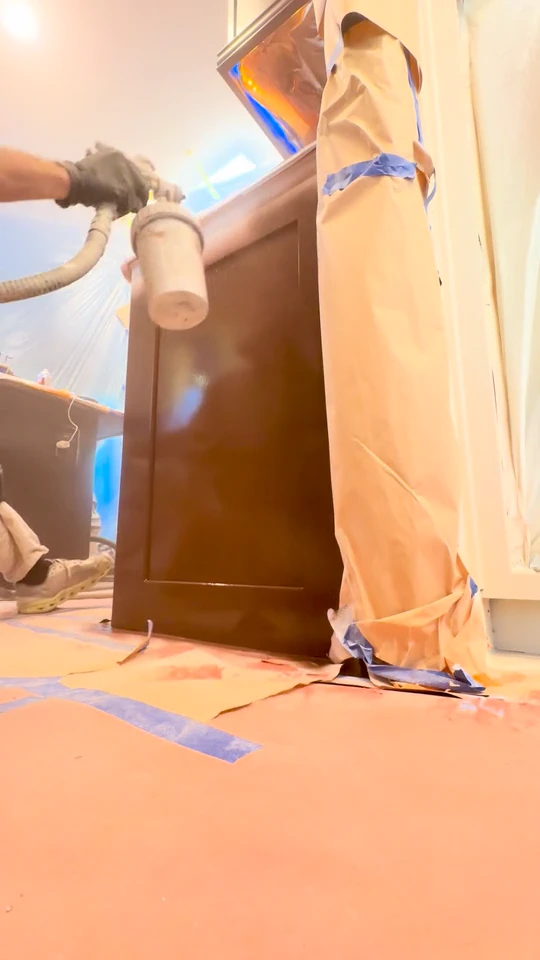
  4. Tyler spraying 2K polyurethane on a prepared kitchen end panel

    Spray & reinstall

    Spray two to three 2K topcoats. Reinstall and align the doors once ready.

    Doors and drawer fronts are sprayed in the negative-pressure booth at the shop.

    Cabinet boxes are sprayed in place inside the sealed work area.

    Build the finish

    The topcoats go on the same way as the primer: doors in the shop's spray booth, boxes in your kitchen's sealed, negative-pressure work area. Each coat gets the required drying time before the next step.

    Back together

    Required drying time, reinstallation, alignment, and the final walkthrough.

2K polyurethane costs more than one-part cabinet paint. Your quote also covers the preparation, shop finishing and drying time shown here.

In your kitchenAbout a weekSealed only during the in-home week.
Doors & drawer fronts in the shopAbout a weekUse your kitchen without the doors.

Larger kitchens and grain filling take longer; your written quote gives the dates.

More process close-ups

See the full spray photo

See the full 14-step process

Finish proof

The finish, up close

White kitchen cabinets and a white island with silver appliances and a vase of branches
White kitchen · refinished

Cabinet refinishing in La Quinta

Keep your kitchen.
Change the finish.

Sound cabinets and a layout you like? Refinish the cabinets you already own in sprayed 2K polyurethane.

  • A sprayed cabinet finishTwo-component 2K polyurethane, with preparation and sanding between coats.
  • Tyler handles your projectFrom the in-home estimate through reinstall and the final walkthrough.
  • A written prep warrantyFive years for chipping, peeling or blistering caused by faulty preparation.
Tyler Fowler, owner of Parallel Painting
Owner-Operated

Meet Tyler

Tyler Fowler handles each project personally, from the estimate through the final walkthrough. Melissa handles scheduling and the phone; you can always ask for Tyler.

  • One jobat a time, Tyler on site
  • 5 yearswritten warranty on prep
  • Samplesin your own kitchen
  • 2016CSLB #1015608 since
Yelp: 56 reviews, 4.8-star rating · Google: 10 reviews, 5.0-star rating

Why Homeowners Choose Parallel Painting

Sprayed 2K polyurethane, a sealed negative-pressure work area, careful preparation and a written 5-year warranty.

  • 2K Polyurethane

    A factory-grade, two-component catalyzed polyurethane, sprayed with HVLP in two to three topcoats.

  • HEPA-Vacuumed Sanding

    Industrial HEPA vacuums hooked to sanders during prep.

  • Sealed Negative-Pressure Containment

    Before sanding starts, Tyler seals the work area and establishes negative pressure.

  • Owner-Operated

    Tyler Fowler handles each project personally, from the estimate through the final walkthrough.

The Coating System

Sprayed 2K Polyurethane, Built Over Real Prep

Every door and drawer front comes off, gets cleaned and sanded, and is sprayed in the negative-pressure booth at Tyler's shop. The cabinet boxes get the same 2K polyurethane right in your kitchen, sprayed inside a sealed, negative-pressure work area that Tyler sets up before sanding begins and keeps in place through spraying. Sanding is HEPA-vacuumed. Priming and surface correction is the longest step of the job. After the first primer coat, every door, drawer front and cabinet surface is skim-glazed with glazing putty, dents, gouges and open seams are spot-puttied, and everything is sanded back smooth. Doors and drawer fronts are checked on inspection tables under bright shop lights, and the cabinet boxes are checked in the kitchen with LED inspection light bars, so dents, sanding marks and uneven spots are found and fixed in primer, before the 2K topcoat goes on. The second primer coat goes on over that corrected surface, so the 2K topcoat lays down on a flat, uniform base. Open-grain oak can also be grain-filled for a glass-smooth door. 2K is a two-component catalyzed finish: it chemically cures into a hard, tough shell instead of just drying like paint.

  • Factory-grade two-component (2K) polyurethane, sprayed
  • Doors and drawer fronts sprayed in a negative-pressure booth at the shop
  • Cabinet boxes sprayed in place inside a sealed, negative-pressure work area
  • HEPA-vacuumed sanding, multiple finish coats on every kitchen. Prime & correct. The longest step. Two primer coats. Between them, every surface is skim-coated with glazing putty, dents and seams are spot-puttied, and it is all sanded smooth. Every surface is checked under bright inspection lights before the topcoat. Optional grain filling.
Wide view of a white kitchen with a long island, white cabinet doors, and light plank flooring

Reviews

Client Reviews

Read reviews on Google and Yelp

“Tyler's work was meticulous. The cabinets look new. The wear, tear, and damage is gone. I could never have done this quality of work myself.”

MichaelGoogle review

“Tyler’s workmanship is exceptional! He’s meticulous when it comes to his work. He refinished our kitchen cabinets and they look amazing! I highly recommend Parallel Painting!”

Carmen A.Google review

“He turned our beech colored wood shaker cabinets into white cabinets and painted our island blue for a nice pop of color. You can tell Tyler takes pride in his work and is very meticulous to every single detail.”

Jamie T.Yelp review

“He also painted my kitchen cabinets and my bedroom doors and trim as well as the front door. So basically everything in my tiny 600 ft condo. It came out gorgeous. He's on time and a meticulous worker.”

SusanGoogle review

Next step

Ready for a Factory-Grade Finish on Your Cabinets?

Tyler takes one job at a time, and Melissa handles his schedule and the phone. Call or text for an in-home estimate.

Call or text Tyler: (951) 551-0583

Call (951) 551-0583Get Your Free Estimate