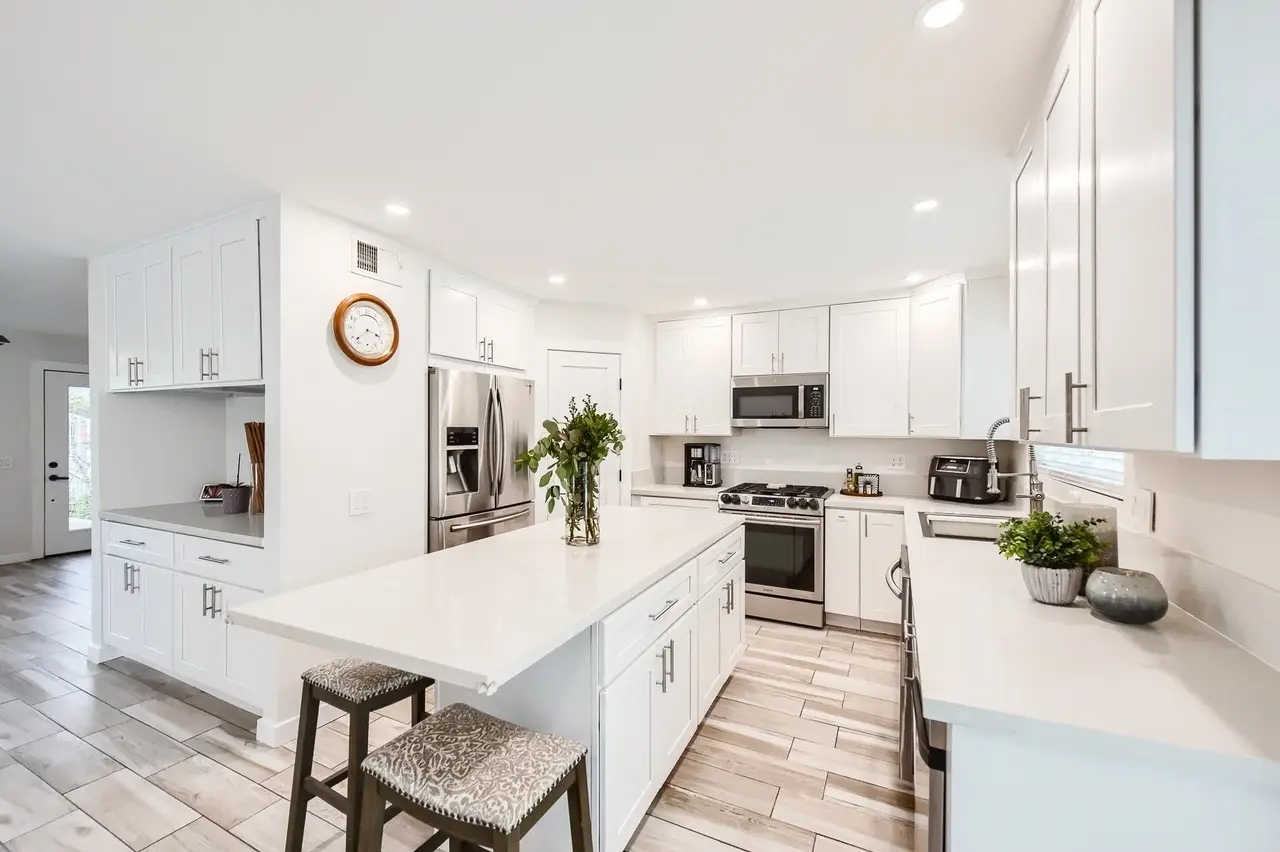
Wide view of a white kitchen with a long island, white cabinet doors, and light plank flooring
White cabinets · refinished
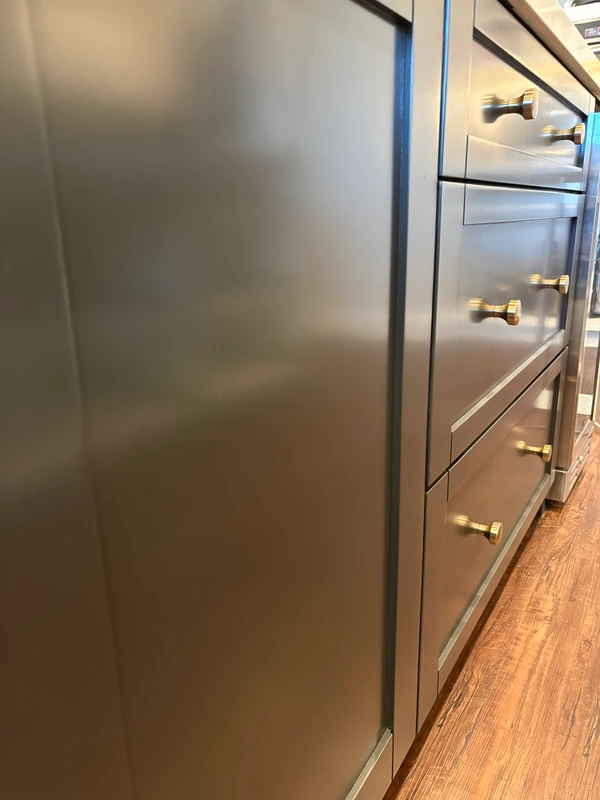
Room reflections and a stainless pull on finished black island doors in Temecula
Black island · sprayed 2K

Sprayed 2K

Cabinet Refinishing Cost in Palm Springs

A smooth sprayed finish. A kitchen you're proud to show off.

  • Yelp: 56 reviews, 4.8-star rating
  • Google: 10 reviews, 5.0-star rating
  • 5-Year Written Warranty

    The written 5-year warranty covers chipping, peeling or blistering caused by faulty preparation. The coating itself is covered by its manufacturer.

  • CSLB #1015608

See and feel finish samples in your own kitchen.

Standard single-color exterior cabinet refinishing commonly runs about $135–$185 per cabinet door and $95–$145 per drawer front before project-specific adjustments.

Coachella Valley · Cabinet cost guide

Budgeting for Palm Springs cabinets

Southern California planning guidance — not a price list.

A Twin Palms kitchen and a Vista Las Palmas remodel can need very different preparation. Cabinet condition and the chosen finish matter more than a mid-century label.

Count the pieces. Define the work.

What the Palm Springs planning ranges cover

Each rate is per one physical cabinet door or drawer front — not per cabinet box.

Cabinet refinishing planning ranges: doors and drawer fronts, grain filling, and painted interiors
OptionWhat it coversPlanning range
Cabinet doorFront and back painted; cabinet boxes, face frames, toe kicks, and side panels included$135–$185 per cabinet door
Drawer frontPainted; same inclusions as the door$95–$145 per drawer front
Grain filling (optional)Light for shallow grain or heavy for deep grain such as red oak; door fronts only, or fronts and backsadds $30–$85 per cabinet door; $10–$20 per drawer front
Painted interiors (optional)The inside of the cabinet boxes, cleaned and sprayed; an average, since it depends on how many boxes there are and their conditionadds $35–$60 per cabinet door; $25–$45 per drawer front

These planning ranges include the standard exterior work on your cabinets: door fronts and backs, drawer fronts, face frames, box exteriors, toe kicks, and side panels.

They also include removal and reinstall, preparation, 2K polyurethane, HEPA-vacuumed sanding, sealed negative-pressure containment, and the 5-year written warranty.

Tyler Fowler handles each project personally.

Oak grain remains visible unless you choose grain filling.

A fan draws air through a regular filter and vents outdoors to help control airborne dust, overspray, and fumes within the work area.

Tyler provides a fixed written quote after counting your doors and drawer fronts and looking over the cabinets in person.

For a full kitchen, the door and drawer-front count is the starting point.

Pricing guidance last verified October 24, 2026.

Mid-century context changes the questions, not the rates

Palm Springs’ historic survey documents Twin Palms and Vista Las Palmas within its residential development history. Twin Palms Estates dates to the late 1950s. A kitchen in that setting may retain earlier cabinetry or have been remodeled; architectural history cannot establish what remains behind the present finish.

If the kitchen has flat-panel doors, inspect the edges as carefully as the broad faces. A flat profile does not eliminate cleaning, adhesion preparation or repair work. Where a wood veneer is present, show Tyler lifting edges, worn corners and previous patches before choosing an opaque painted finish.

An opaque 2K finish changes the appearance of a wood face. Identify any original-looking panels or built-ins that should remain wood before requesting that every cabinet be painted. This is a scope decision about the kitchen’s existing material, without claiming that every Palm Springs modernist home contains the same species or door style.

Desert light and interior condition are separate observations

Palm Springs is in the hot, dry Coachella Valley. Strong sunlight and UV exposure are relevant when looking at a kitchen near large windows, but indoor conditions depend on glazing, shading and use. Mark the sun-facing doors and compare their condition with shaded storage rather than assigning the same damage to the whole room.

Show any fading, cracked old finish or lifting surface during the visit. Heat is context for the inspection, not proof of the cause. The quote should identify the preparation actually needed, and any coating-performance statement must follow the selected system’s technical instructions rather than a blanket desert guarantee.

For a condo or association property, establish access for removing doors and returning finished pieces. Ask which entry, parking and work instructions apply to the address. Those details help define a workable project without assuming that all Palm Springs communities share one rule or charging a city-wide desert premium.

Separate a style change from optional cabinet work

A change from stained wood to an opaque color does not automatically require painted box interiors. Look inside the cabinets, identify areas that are already sound and decide what will remain visible after the doors are closed. Glass-front storage and open shelves deserve their own discussion in the requested scope.

The price table distinguishes exterior refinishing, grain filling and interior work. For a Twin Palms or Vista Las Palmas estimate, note which existing surfaces should be retained and which should change. That inventory is more useful than applying an average kitchen total to a house because of its architectural style.

Planning the visit from Anza

Palm Springs is roughly 43 road miles from Anza on the mountain approach. CA-371 connects to CA-74 east into Palm Desert, then the valley route continues toward Palm Springs. Twin Palms and Vista Las Palmas have different last legs; confirm the property address and visit time when you call.

Local context sources

Housing history and place names are context for an inspection; they do not establish the material in an individual kitchen.

Questions before the quote

Palm Springs cabinet cost FAQ

Does a Twin Palms flat-panel kitchen automatically cost less to refinish?

No. Twin Palms’ mid-century history does not establish the current cabinet condition. A slab face can still have worn edges, failing paint or damaged veneer. The count and inspection determine the preparation; a simple-looking profile alone cannot confirm a lower quote.

Should Vista Las Palmas wood cabinets be painted or left visible?

Identify the material and the appearance to be retained before deciding. An opaque finish covers the wood face, so show Tyler any panels or built-ins that should stay wood. Vista Las Palmas’ architectural context is a reason to discuss the choice carefully, rather than assume every kitchen needs the same treatment.

Does Palm Springs desert heat add an automatic charge?

There is no separate Palm Springs rate. The Coachella Valley climate prompts a closer look at exposed finishes and site conditions. If additional preparation is necessary, the written quote identifies it as project scope rather than adding a general desert-climate charge.

What should be checked on a sunny Palm Springs cabinet wall?

Compare cabinets near glazing with shaded doors, and point out discoloration, lifting veneer or cracks in the old finish. Those observations help Tyler inspect the affected surfaces. Window exposure does not, by itself, prove why the coating changed or establish a different price.

Can a Palm Springs condo keep its existing cabinet interiors?

Sound interiors can be discussed separately from the exterior color change. At an association property, also provide the address-specific contractor-entry and parking instructions. Leaving suitable interiors alone and defining the access plan keeps the requested scope clear before a fixed quote is written.

Plan the Palm Springs cabinet project

Get Your Free Estimate

Or call (951) 551-0583

Tyler or Melissa will reply to set up a visit. Tyler brings a sample to your home and gives a fixed written quote after looking over the cabinets in person.
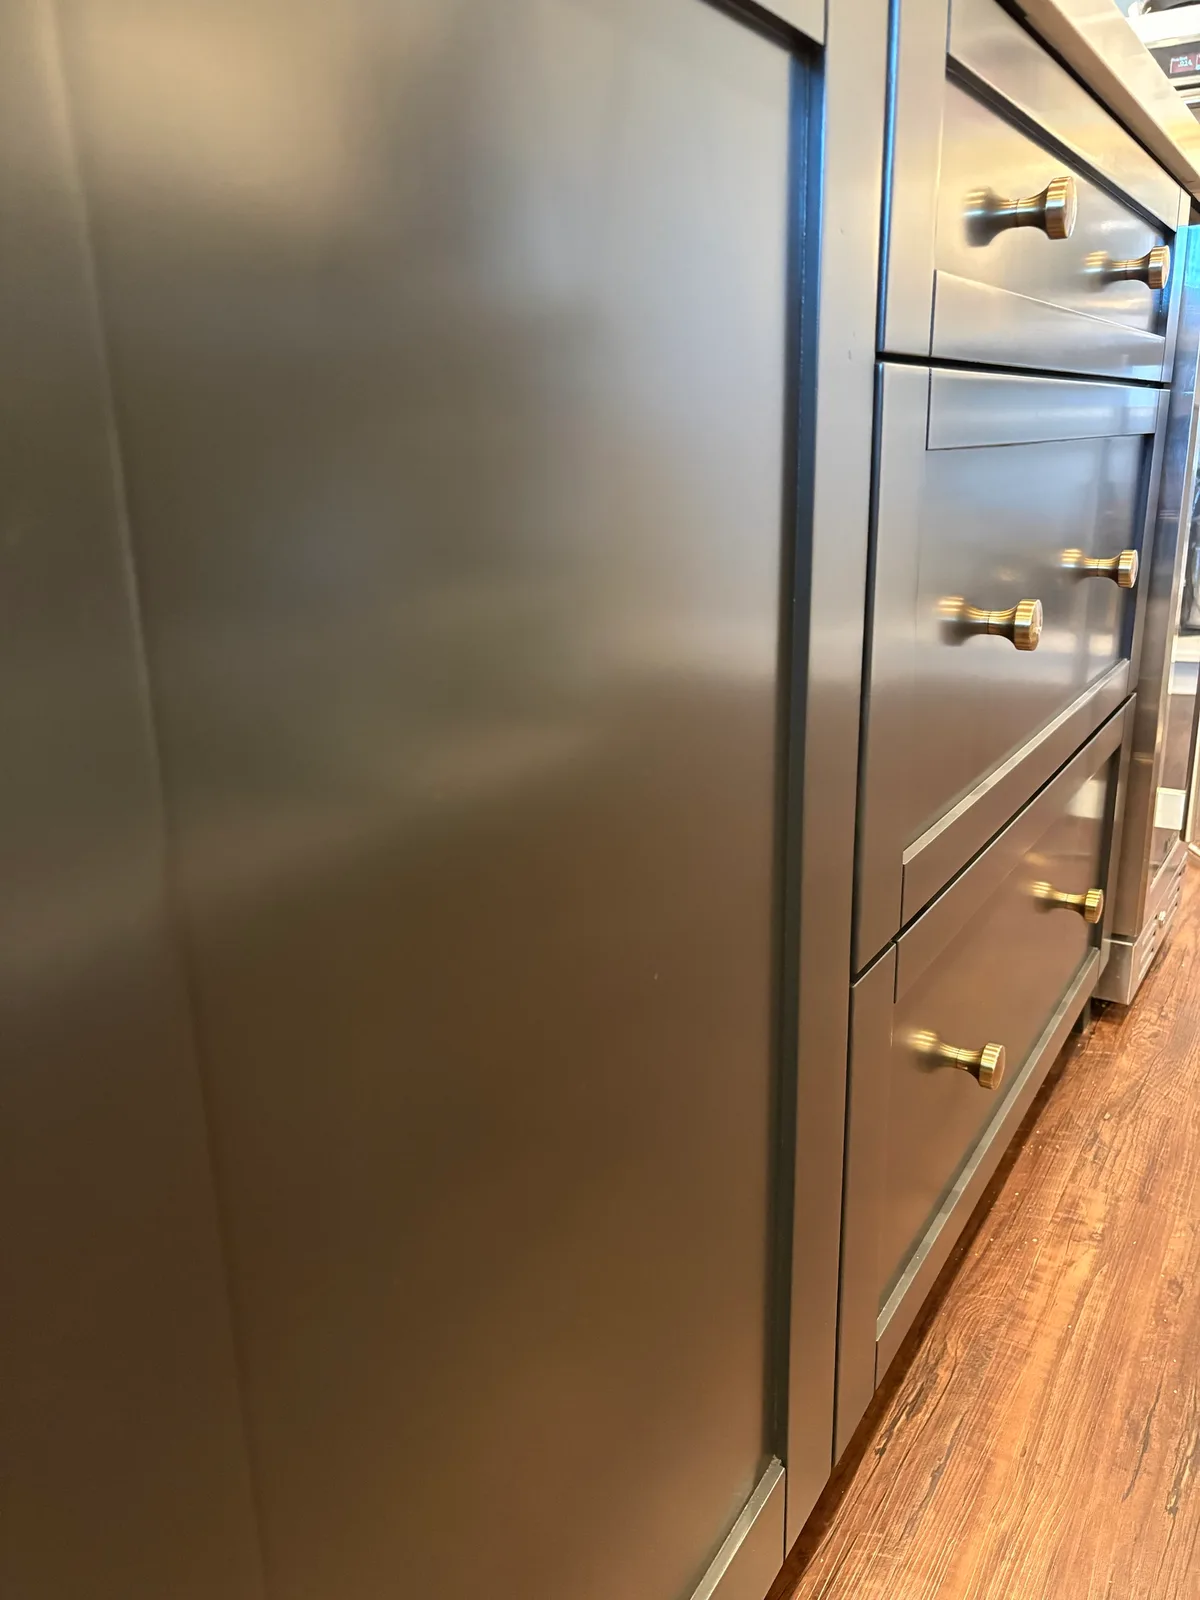
The Finished Result

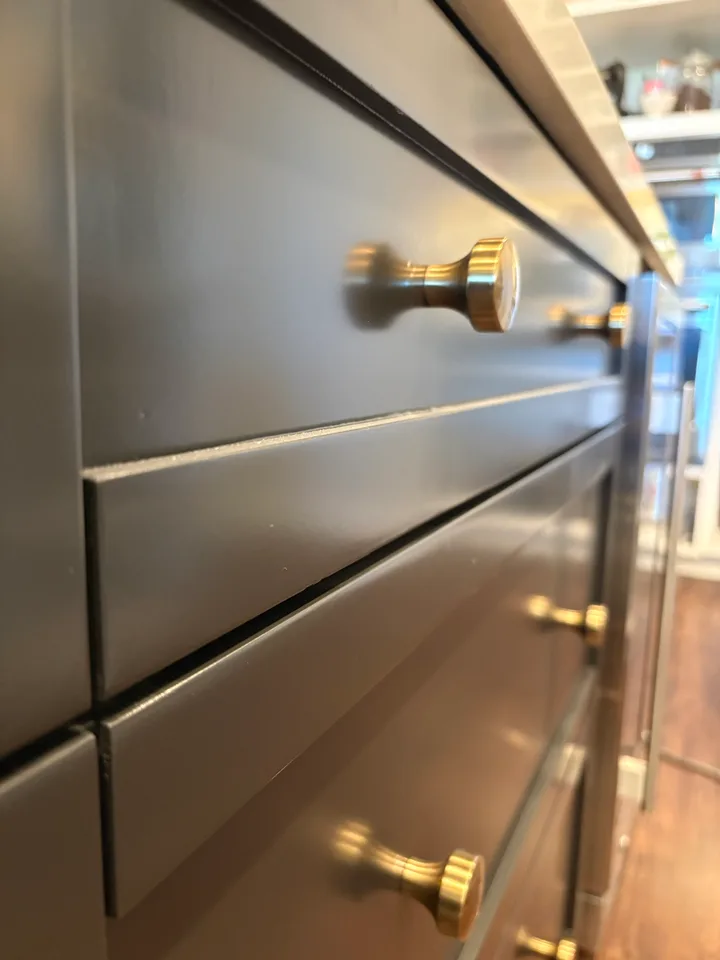
A smooth, sprayed 2K finish on a kitchen island, refinished in place.

Watch the reflection · 0:04
Black island door and drawer bank with brass knobs; the room reflects in the sprayed door
Black island · sprayed 2K

What goes into that finish

The work behind the finish.

The time is in the preparation, surface corrections, sanding and sprayed coating system. These are photos from Tyler’s process.

The Cabinet Refinishing Process

Four production phases, from door removal through the final walkthrough. Tyler Fowler handles each project personally.

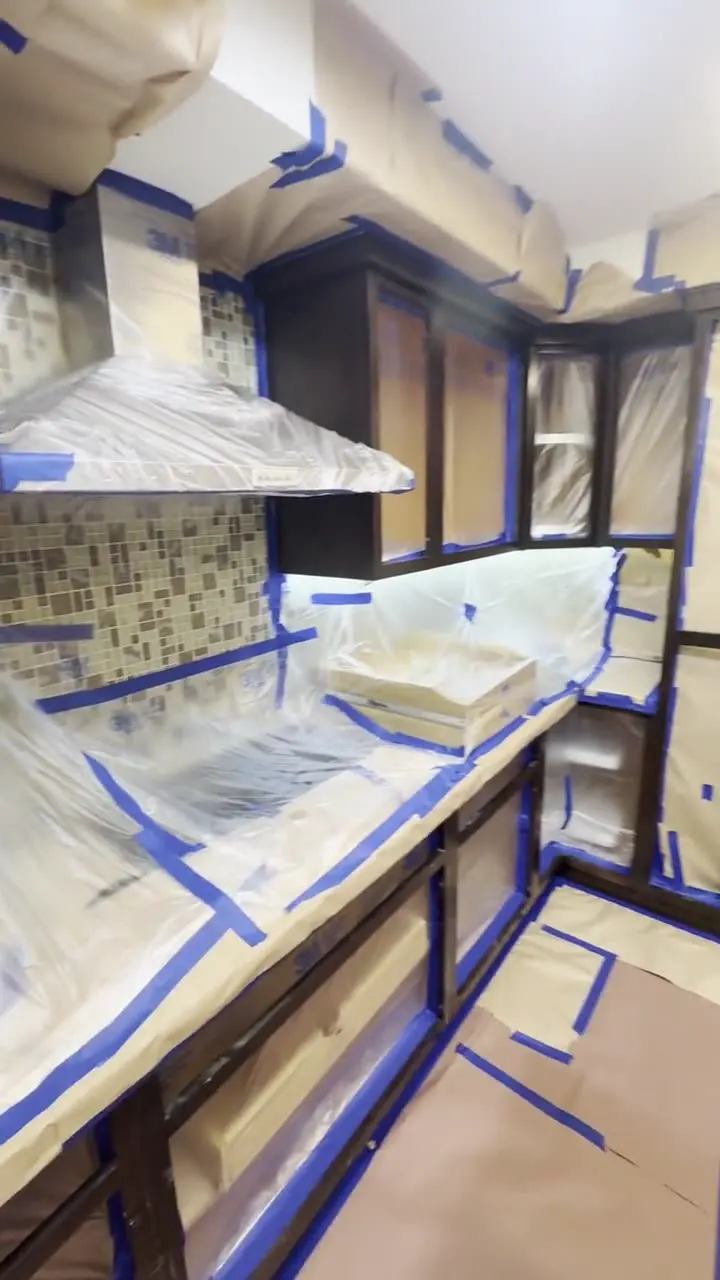
  1. Kitchen openings, counters and floors masked before cabinet preparation

    Protect & clean

    Remove and label the doors. Mask the kitchen, degrease and prepare the surfaces.

    Cabinet box exteriors are sprayed in place, inside a sealed, negative-pressure work area that is set up in the kitchen before sanding begins and stays in place through spraying.

    A fan draws air through a regular filter and vents outdoors to help control airborne dust, overspray, and fumes within the work area.

    Protect and prepare

    The doors and drawer fronts are prepped at Tyler's shop. The cabinet boxes get the same prep in your kitchen, where you can see it done.

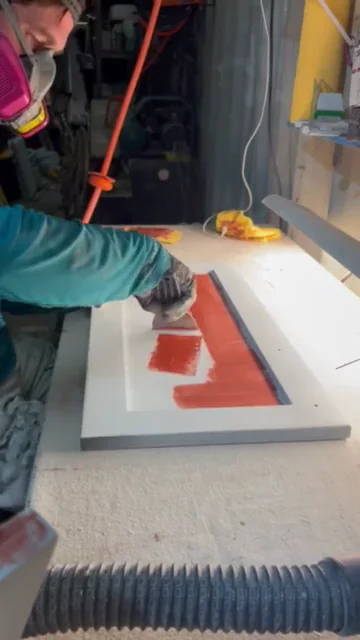
  2. Applying glazing putty to a primed cabinet door on a lit inspection table

    Prime & correct

    The longest step. Two primer coats. Between them, every surface is skim-coated with glazing putty, dents and seams are spot-puttied, and it is all sanded smooth. Every surface is checked under bright inspection lights before the topcoat. Optional grain filling.

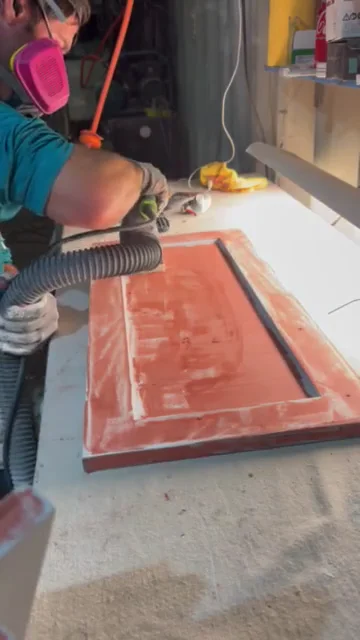
  3. Sanding the glazing-putty skim on a cabinet door

    Sand smooth

    Sand the corrections, primer and between topcoats. Each coat needs drying time.

    Sanding is HEPA-vacuumed, and the cabinet exteriors are finished in 2K polyurethane.

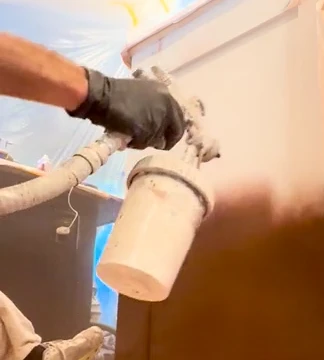
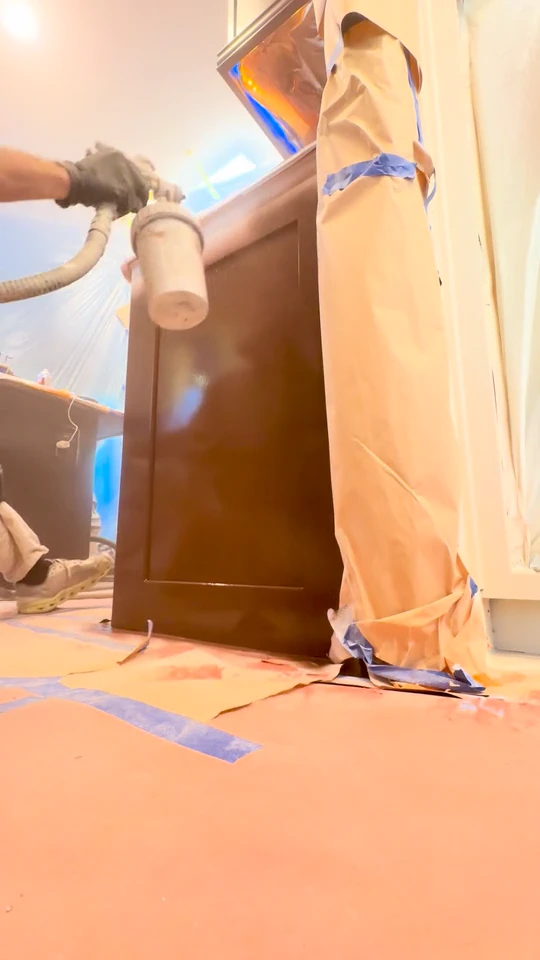
  4. Tyler spraying 2K polyurethane on a prepared kitchen end panel

    Spray & reinstall

    Spray two to three 2K topcoats. Reinstall and align the doors once ready.

    Doors and drawer fronts are sprayed in the negative-pressure booth at the shop.

    Cabinet boxes are sprayed in place inside the sealed work area.

    Build the finish

    The topcoats go on the same way as the primer: doors in the shop's spray booth, boxes in your kitchen's sealed, negative-pressure work area. Each coat gets the required drying time before the next step.

    Back together

    Required drying time, reinstallation, alignment, and the final walkthrough.

2K polyurethane costs more than one-part cabinet paint. Your quote also covers the preparation, shop finishing and drying time shown here.

In your kitchenAbout a weekSealed only during the in-home week.
Doors & drawer fronts in the shopAbout a weekUse your kitchen without the doors.

Larger kitchens and grain filling take longer; your written quote gives the dates.

More process close-ups

See the full spray photo

See the full 14-step process

Finish proof

The finish, up close

White kitchen cabinets and a white island with silver appliances and a vase of branches
White kitchen · refinished

Cabinet refinishing in Palm Springs

Keep your kitchen.
Change the finish.

Sound cabinets and a layout you like? Refinish the cabinets you already own in sprayed 2K polyurethane.

  • A sprayed cabinet finishTwo-component 2K polyurethane, with preparation and sanding between coats.
  • Tyler handles your projectFrom the in-home estimate through reinstall and the final walkthrough.
  • A written prep warrantyFive years for chipping, peeling or blistering caused by faulty preparation.
Tyler Fowler, owner of Parallel Painting
Owner-Operated

Meet Tyler

Tyler Fowler handles each project personally, from the estimate through the final walkthrough. Melissa handles scheduling and the phone; you can always ask for Tyler.

  • One jobat a time, Tyler on site
  • 5 yearswritten warranty on prep
  • Samplesin your own kitchen
  • 2016CSLB #1015608 since
Yelp: 56 reviews, 4.8-star rating · Google: 10 reviews, 5.0-star rating

Why Homeowners Choose Parallel Painting

Sprayed 2K polyurethane, a sealed negative-pressure work area, careful preparation and a written 5-year warranty.

  • 2K Polyurethane

    A factory-grade, two-component catalyzed polyurethane, sprayed with HVLP in two to three topcoats.

  • HEPA-Vacuumed Sanding

    Industrial HEPA vacuums hooked to sanders during prep.

  • Sealed Negative-Pressure Containment

    Before sanding starts, Tyler seals the work area and establishes negative pressure.

  • Owner-Operated

    Tyler Fowler handles each project personally, from the estimate through the final walkthrough.

The Coating System

Sprayed 2K Polyurethane, Built Over Real Prep

Every door and drawer front comes off, gets cleaned and sanded, and is sprayed in the negative-pressure booth at Tyler's shop. The cabinet boxes get the same 2K polyurethane right in your kitchen, sprayed inside a sealed, negative-pressure work area that Tyler sets up before sanding begins and keeps in place through spraying. Sanding is HEPA-vacuumed. Priming and surface correction is the longest step of the job. After the first primer coat, every door, drawer front and cabinet surface is skim-glazed with glazing putty, dents, gouges and open seams are spot-puttied, and everything is sanded back smooth. Doors and drawer fronts are checked on inspection tables under bright shop lights, and the cabinet boxes are checked in the kitchen with LED inspection light bars, so dents, sanding marks and uneven spots are found and fixed in primer, before the 2K topcoat goes on. The second primer coat goes on over that corrected surface, so the 2K topcoat lays down on a flat, uniform base. Open-grain oak can also be grain-filled for a glass-smooth door. 2K is a two-component catalyzed finish: it chemically cures into a hard, tough shell instead of just drying like paint.

  • Factory-grade two-component (2K) polyurethane, sprayed
  • Doors and drawer fronts sprayed in a negative-pressure booth at the shop
  • Cabinet boxes sprayed in place inside a sealed, negative-pressure work area
  • HEPA-vacuumed sanding, multiple finish coats on every kitchen. Prime & correct. The longest step. Two primer coats. Between them, every surface is skim-coated with glazing putty, dents and seams are spot-puttied, and it is all sanded smooth. Every surface is checked under bright inspection lights before the topcoat. Optional grain filling.
Wide view of a white kitchen with a long island, white cabinet doors, and light plank flooring

Reviews

Client Reviews

Read reviews on Google and Yelp

“Tyler's work was meticulous. The cabinets look new. The wear, tear, and damage is gone. I could never have done this quality of work myself.”

MichaelGoogle review

“Tyler’s workmanship is exceptional! He’s meticulous when it comes to his work. He refinished our kitchen cabinets and they look amazing! I highly recommend Parallel Painting!”

Carmen A.Google review

“He turned our beech colored wood shaker cabinets into white cabinets and painted our island blue for a nice pop of color. You can tell Tyler takes pride in his work and is very meticulous to every single detail.”

Jamie T.Yelp review

“He also painted my kitchen cabinets and my bedroom doors and trim as well as the front door. So basically everything in my tiny 600 ft condo. It came out gorgeous. He's on time and a meticulous worker.”

SusanGoogle review

Next step

Ready for a Factory-Grade Finish on Your Cabinets?

Tyler takes one job at a time, and Melissa handles his schedule and the phone. Call or text for an in-home estimate.

Call or text Tyler: (951) 551-0583

Call (951) 551-0583Get Your Free Estimate